Micro Python - Get started with Raspberry Pi Pico
Introduction to Raspberry Pi Pico
The Raspberry Pi Pico has quickly become a popular choice among hobbyists, students, and developers due to its affordability and versatility. With its compact size and powerful features, the Pico opens up a world of possibilities for various applications. In this review, we'll explore why the Raspberry Pi Pico is an excellent investment, showcasing real-world examples of how it can be used.
Why Choose the Raspberry Pi Pico?
- Home Automation: With its GPIO pins and support for various interfaces, the Pico can be used to create smart home automation systems. You can connect sensors to monitor temperature, humidity, and motion, and control lights, switches, and appliances based on predefined conditions. The Pico's ability to communicate with Wi-Fi and Bluetooth modules further expands its capabilities in this area.
- Robotics: The Pico is a fantastic choice for robotics projects. Its GPIO pins can be connected to motor drivers and sensors, allowing you to build robots that can navigate, sense their surroundings, and perform specific tasks. From line-following robots to autonomous drones, the Pico provides a solid foundation for building intelligent and interactive robotic systems.
- Data Logging and Monitoring: The Pico's ability to interface with various sensors, such as accelerometers, gyroscopes, and environmental sensors, makes it ideal for data logging and monitoring applications. You can collect data from sensors and store it on an SD card or transmit it wirelessly to a central server for analysis. This makes the Pico suitable for weather stations, fitness trackers, and environmental monitoring systems.
- Game Controllers: Thanks to its programmability and support for MicroPython, the Pico can be transformed into a custom game controller. You can connect buttons, switches, and joysticks to the GPIO pins and create unique gaming experiences. Whether you want to build a retro arcade controller or a specialized controller for a specific game, the Pico offers the flexibility to bring your gaming ideas to life.
- Educational Projects: The Pico is an excellent tool for teaching and learning about embedded systems and programming. Its affordability, beginner-friendly MicroPython support, and extensive community resources make it an ideal choice for educational projects. Students can explore concepts like sensors, actuators, and programming logic, enabling hands-on learning in a fun and engaging manner.
In conclusion, the Raspberry Pi Pico is a compact, versatile, and affordable microcontroller board that opens up a world of possibilities. From home automation and robotics to data logging and educational projects, the Pico empowers users to bring their ideas to life in real-world applications. Whether you're a beginner or an experienced developer, the Raspberry Pi Pico offers a powerful platform for exploring the exciting realm of embedded systems.
How to get started!!
Step 1: Purchasing your first Pico
a) Buy a Pico!
- There are two options for the Pico
- Standard Raspberry Pi Pico (no WiFi)
- Wireless Raspberry Pi Pico (works on WiFi)
- I recommend the wireless Pico as this will allow you to easily connect your Pico for your projects. In addition, purchasing a Pico with pre soldered headers (the gold pins / connectors on the board) will make your life far easier in the long run.
b) Now wait for your Pico to arrive, easily the hardest part!
Step 2: Set up your Raspberry Pi Pico Firmware
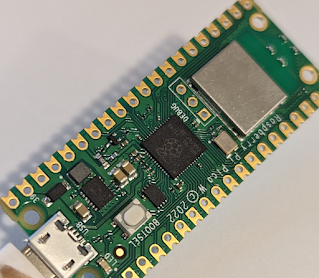
a) Unbox your Pico! Give it a name... like Fred.
b) While holding the little white bootsel button, connect your Pico to your PC with a micro USB cable.
- Holding the bootsel button will put the pick into a mode that allows you to load new firmware.
- It will appear as a USB drive on your PC.
- Ensure you are using a data usb cable. Many micro USB cables are power only and will not connect data between your Pico and PC. Chop these cables up and recycle immediately, future you will thankyou. If you must keep it, tie a knot in it so you know its a power only cable.
c) Download the latest firmware for your Pico (download the "latest" firmware, avoid the nightly builds).
- Important, ensure you download the correct firmware for your Pico.
d) Copy your newly downloaded firmware UF2 file directly onto your Pico drive (where it looks like a USB thumb drive).
- The Pico USB thumb drive will almost instantly disappear
You now have micro python firmware on your Pico!
Step 3: Connecting to your Pico with coding software
Thonny is the software we will use to write code onto the Pico.
a) Download and Install Thonny from the official website.
b) Open Thonny
c) In the bottom right of the Thonny window, you will see a field that notes which COM port your pico is connected to.
- In some cases you may need to click this and select the Raspberry Pi Pico from the list that appears.
- It doesn't matter if you choose Raspberry Pi Pico or RP2040

- The three >>> indicates that we are connected successfully and ready to go.